Soundproofing Music Studios and Sound Isolation Explained
The subject of soundproofing music studios is a highly debated topic for musicians and non-musicians alike. The musicians are worried about bothering others and they also want their studio or practice room to yield the best sound possible. The non-musicians are worried about the musicians bothering them.
Talk about a vicious cycle there! In general, apart from the music aspects of things, people also look into soundproofing material to help deaden road noise when they live near a highway. They also look to it when designing a home theater, in order to help improve and focus the sound of the theater’s audio system. Given that this is a musician’s website, this article will focus a little bit more on the aspects of soundproofing for music. However, keep in mind that a lot the concepts are the same for other applications. So, if you are the non-musician type, it’s in your best interest to read through it as well.
Now, before we get started let’s start by clearing up the most common misconception about soundproofing: Soundproofing and sound isolation are NOT the same thing. Let me explain…
There are 2 reasons that people go about soundproofing a room:
- To isolate noise and contain it. This is the case where the intention is to control the location of the sound. For example, when you are trying to keep the music INSIDE of your studio or when you are trying to keep outside noises OUTSIDE of your studio as to not mess with your recordings.
- To control the actual sound of a room. In this case, what you are aiming to do is control the overall sound of a room and how sound waves move about your studio. For example, this is done to correct bad sound reflections and rooms that sound overly bright. This is the acoustics part of soundproofing.
The bad news for most of us is that it is much easier and considerably less expensive to soundproof a room for proper acoustics and good sound than it is to contain the sound within the room. Let me put it this way…
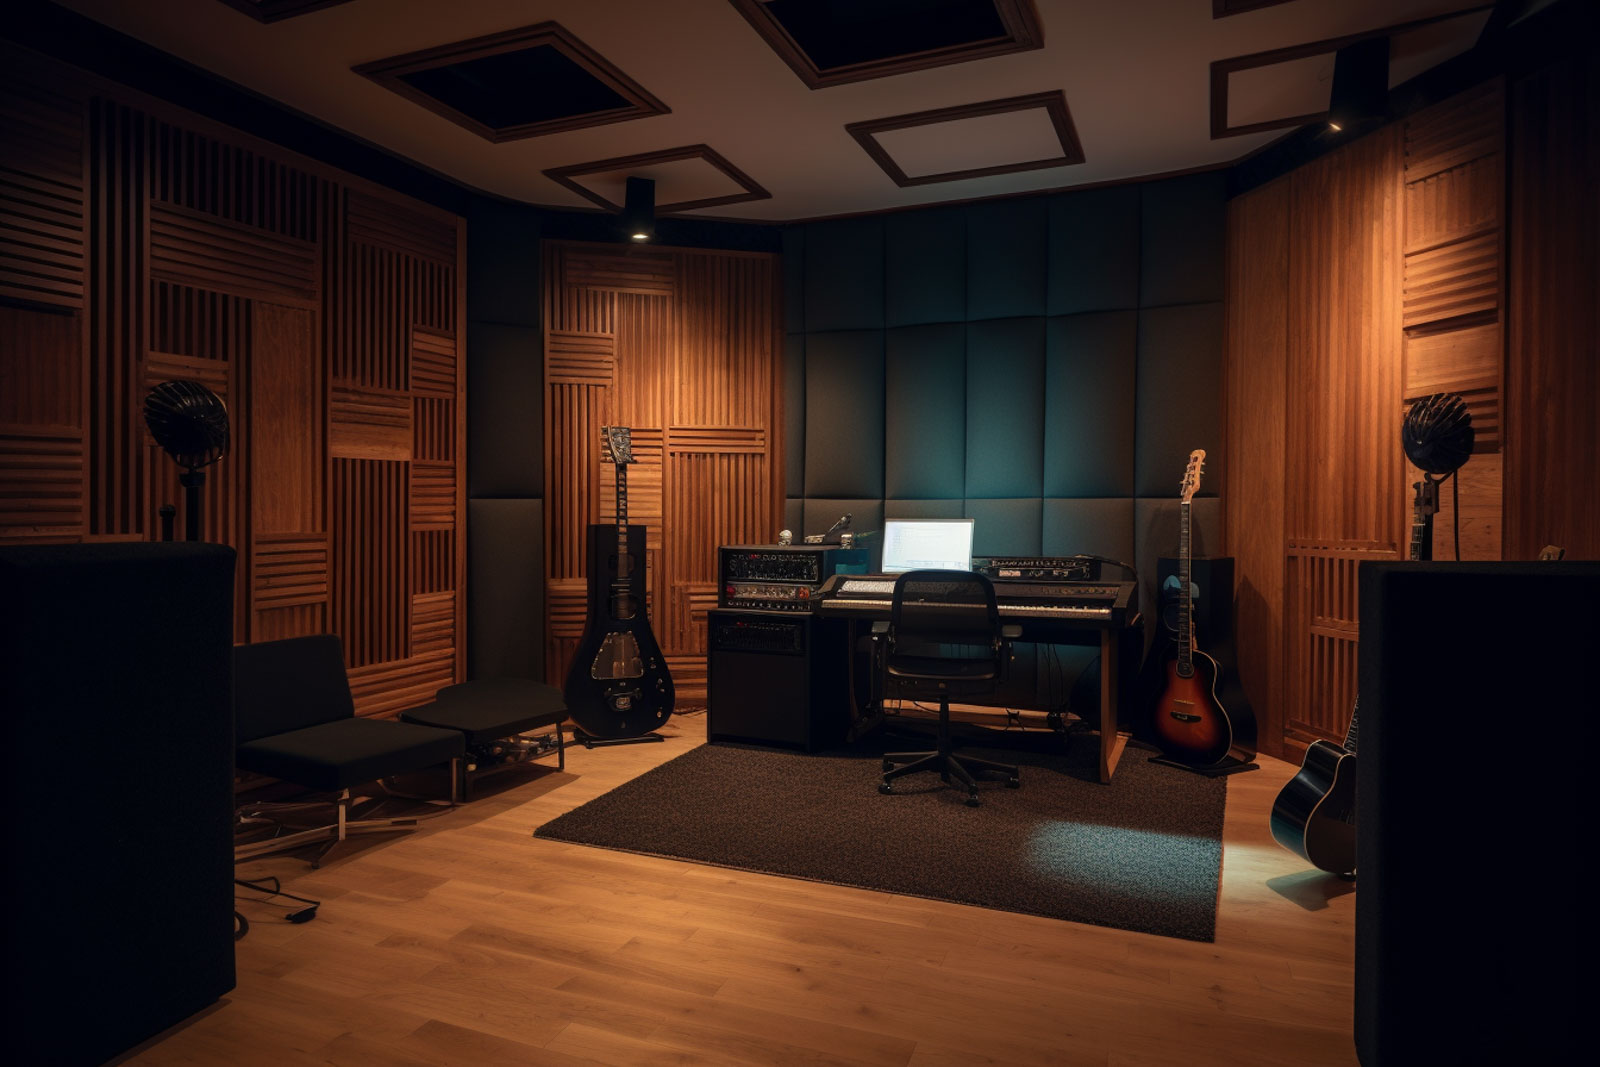
You can cover your practice room from top to bottom in tons of acoustic foam, carpet remnants, pillows, egg crates and everything else you can find and the SOUND IS STILL GOING TO GET OUT! Your neighbors are still going to hate you and they are still going to call the cops. Why? Well, because just about all the sound is going to get out anyway. In fact, I can assure you in won’t be much different than not having anything on the walls at all. However, inside the room itself, you will have little to no sound reflections. The room will sound dead and considerably quieter. For playing loud drums for example, it will feel much more comfortable inside and your ears won’t feel like they are going to sink deeper into your brain with every bang on the snare drum.
Soundproofing rooms for proper acoustics
Done correctly or not, soundproofing walls will have a big effect in the overall sound of the room inside. The same thing applies to any efforts of soundproofing ceiling and floor areas. Keep in mind that soundproofing ceilings can be a bit tricky due to the obvious; anything you do will have to be upside down and attached to the ceiling. The more you cover all those areas the more dead the room will sound. Please note that a room that’s completely dead may be good for recording vocals, but not for most other instruments. You want some sound reflections, but only good ones. I’m not going to go too much into detail on fine-tuning a room, because that can easily take an entire website just for that. But let’s talk about it for a bit…
Like I said above, you want some reflections, but what you need is a good balance. You need a combination of sound absorption, slight reflections and diffusion. The absorption part is obvious: Sound waves get absorbed into the studio foam instead of reflecting back out into the room. The thicker the foam the more and bigger the sound waves that are absorbed by the foam. For this reason, studio foam comes in all kinds of shapes and sizes. Thinner wedges and pyramids are meant to absorb high and medium frequencies, given those sound waves are shorter and smaller.
In order to catch large sound waves, for example low-frequency bass notes, you need really thick foam. These are usually called bass traps and are almost always placed at the corners of a room. Low frequency sound waves are BIG and can often span a few feet. For this reason it is harder, if not impossible to properly set acoustics for a very small room. Standing waves are all over the place there. You can quite get it perfect, but you can improve it dramatically.
For reflections you want to leave some areas of the walls untreated. Another common procedure to aid in good reflections when soundproofing floors is to use wood. It is a common belief that a hardwood floor can help a room sound really sweet.
Finally, you want to diffuse the reflections that you actually allowed. There are many types of diffusers available in various material types. Essentially, a diffuser will have odd shapes in different planes along its surface. When sound waves hit the diffusers they are reflected back into the room in a large array of varying angles. This helps the sound travel across the room in a more controlled fashion, thus improving the overall sound quality of the room.
Soundproofing to keep the music INSIDE the room
But how do you go about keeping the sound isolated and INSIDE the room? Well, that’s the real tricky part. There are 3 ways to go about it actually:
- Heavy mass
- Sealed air
- Complete mechanical isolation
Using any of the above on their own will yield some noise reduction benefits. But, in order to do the best job possible to keep the sound inside, you are better off doing all 3. Unfortunately, this is VERY expensive and unless you are really serious about practicing and making all kinds of racket at times when the neighbors will not appreciate it, then you are better off doing what you can with the budget at hand.
Now let me explain the above methods a little bit in order to not leave you confused.
Heavy mass: When you want to keep sound contained, the denser the mass of the object acting as insulation, the better is will be at containing the sound. Sound waves will still get through, but not as much as if you were using lightweight materials. This is the very reason why using just foam to isolate DOES NOT WORK.
Sealed air: This is essentially a great insulator. What this implies is that there should be a sealed area of dead air space inside the walls of your studio. In simple terms, the inner wall, dead air, and the outer part of the wall. This sealed area is actually very efficient at containing sound. If you combine dense mass on the inside and outside of the walls, while also including a space of sealed air in between, you can get great results.
Complete Isolation: This is also called mechanical isolation, or more commonly, “A room within a room.” This method basically has you build a room with walls, ceiling, floor, insulation and the whole 9 yards. However, the room actually “floats” or sits in the middle of another room. The inside room is completely detached from the walls of the outer room with a space of dead air. Even more, if the inside room also sits atop insulation, like dense rubber blocks, it will help detach the room even more from the outside. This room within a room method is the ultimate sound isolator. If done right, this can reduce the sound in the outside so much that you could likely practice at any hour of the day or night. Sound will STILL get out, but it will be very minor. As you might expect, this method is the most involved as it combines all 3 methods at once, therefore it’s VERY expensive. It is essentially a full-on building project best left to a professional. Though it is fairly safe to point out that even the professionals need to be trained. Many are good at soundproofing, but most lack the know-how of the specific and very detailed requirements of sound control for music studios.
Conclusion
To conclude, the art of soundproofing music studios is a science in itself. Before taking on a project be sure to study the room first. Make a list of what your goals for the room are. Be honest to yourself about your budget and the time you will spend in that room. If you think you cannot afford to build a room that’s isolated enough to play late at night, then try and map out a realistic schedule of what time frames you can play during the day. Take all the necessary measurements and find as much information about the subject as you can. Buy a good soundproofing book or video to learn more about your proposed project. This might seem like a lot of work, but it will pay in the long run.
If you walk into a project like this without the proper knowledge you will spend a lot of time and money on soundproofing material and will most likely end up with a room that does not meet your expectations. Any time and money you can spend beforehand in order to get ready will be well worth it!

Hmm…nice information!!
Actually the art of soundproofing is a science in itself. The sealed air is essentially a great insulator. Which implies is that there should be a sealed area of dead air space inside the walls of your studio.
https://www.aokinsulation.ie/index.php/home-insulation